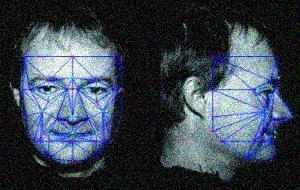
Face Id是一款高端的人脸解锁软件,官方称:“在一百万张脸中识别出你的脸。”百度、谷歌、腾讯等各大企业都花费数亿来鞭策人工智能的崛起,而实际固然是没有的!万万别再当一只井底之蛙!互联网火速的发展,网络上大量Python程序员共享的各类资源库,人脸识别早就是各位程序员必备技能之一了,一点也不神奇。如今只需用Python的数四十行代码就可以完成人脸定位!小编用古仔照片做一个五官定位!固然python库使用到人工智能定位五官。让机器学习上千张人脸来进行特征提取。然后用这个模子在新的照片中自动找出五官!

五官定位
开发环境:
Python 3 ;
Windows 7或MacOS,以及Linux等所有系统;
一个摄像头、PyCharm;
pip3 install face_recognition
pip3 install pillow
* 安装face_recognition 的时候需要安装 dlib,windows系统dlib安装需要cmake。下载安装Cmake即可,dlib安装失败的话可以直接下载.whl进行安装:
1.到这里去下载你需要的的dlib轮子:link to dlib
2.cmd进入你刚下好whl文件的位置,然后输入
pip install 文件名.whl
项目python代码:
#!/usr/bin/env python3
# -*- coding: utf-8 -*-
# author Roc.Wong  www.sandbean.com
from PIL import Image,ImageDraw
import face_recognition

image = face_recognition.load_image_file('gtl.jpg')
face_landmark_list = face_recognition.face_landmarks(image)

print('i found {} face(s) in this phptograph.'.format(len(face_landmark_list)))

for face_landmarks in face_landmark_list:
    facial_features = [
        'chin',
        'left_eyebrow',
        'right_eyebrow',
        'nose_bridge',
        'nose_tip',
        'left_eye',
        'right_eye',
        'top_lip',
        'bottom_lip'
    ]

    for facial_feature in facial_features:
        print("The {} in this face has the following points:{}".format(facial_feature,face_landmarks[facial_feature]))

pil_image = Image.fromarray(image)
d = ImageDraw.Draw(pil_image)

for facial_feature in facial_features:
    d.line(face_landmarks[facial_feature], width=4)
    pil_image.show()
末了打印出脸部五官的详细坐标,用线条描绘脸部的详细特征。

是不是很棒棒?用了短短不到40行的python代码就完成了人脸面部特征定位的使命,是不是很有造诣感呢?
热门文章